In the Windows 10 latest build, i.e. Windows 10 April 2018 Update (version 1803), Microsoft added a new settings page to control the Startup items that start along with Windows OS. Apart from the Task Manager | Startup tab, this is a new page where you can control it.
In this quick tip on Windows 10, we are going to see how to change the startup settings in latest version of Windows 10.


In prior versions of Windows, there was only one option to enable/disable the startup items that start along with Windows. This settings was present in the Startup tab of the Task Manager. Along with Windows 10 April 2018 Update (version 1803), Microsoft enhanced this startup experience by moving it to the Settings app. The new Startup settings page provides a list of Windows apps to help you to enable/disable the startup apps that runs automatically when you start your system.
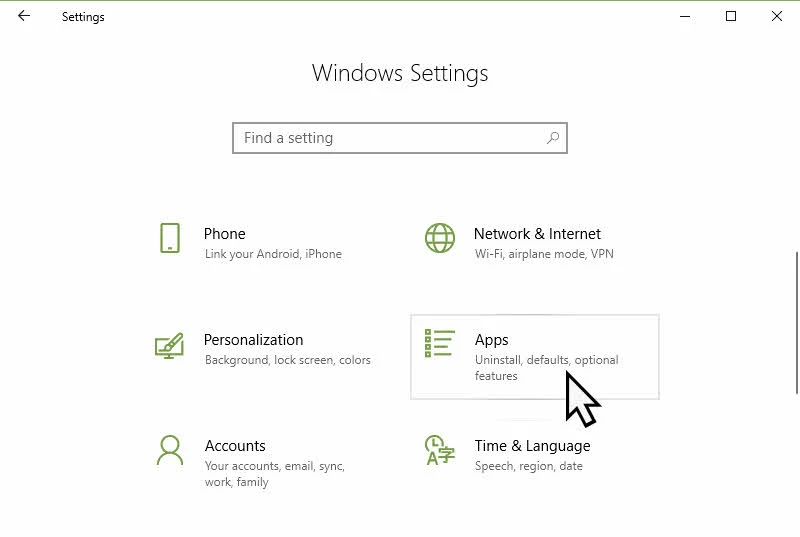
To enable/disable the startup items in Windows 10, open your Windows 10 Settings app and navigate to the Apps tab, as shown in the following screenshot:

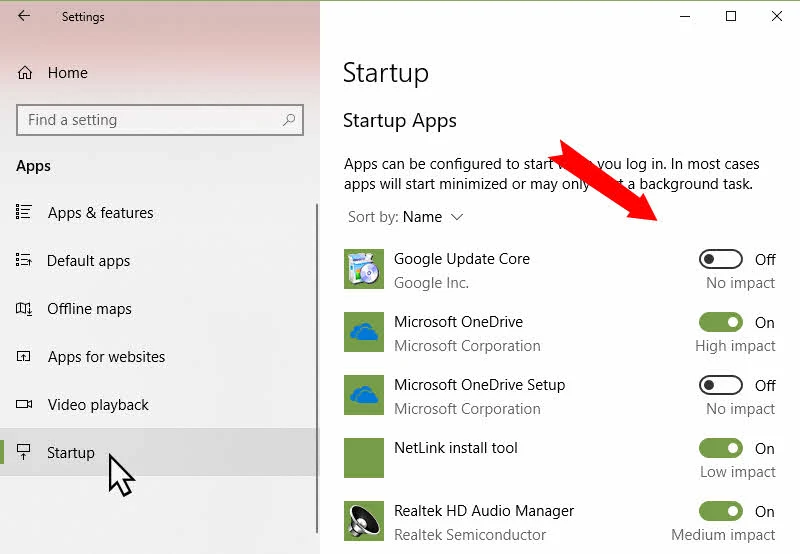
While in the App Settings page, navigate to Startup from the left navigational menu. As shown in the below screenshot, the right-side panel will list down the applications that run along with Windows. Enable the one that you want to run along with Windows, disable the others that you don't need. Disabling items will speed up the booting process of the operating system.

That's all about today. We learned how to change the startup settings in the Windows 10 April 2018 update. If you haven't receive this update yet, here's how to download the latest version of Windows 10 update for PC.
Was the post helpful? Don't forget to share us your feedback and comments. Till the next post, read the other articles/tutorials that I already published here.


