When you search for a text in Visual Studio, by default it lists the matched code block along with the file name in the search result. But, some time just listing the file name is enough to focus on where the text is available.
Visual Studio provides an option to drill down the search result and to keep you focused on what you wanted to view. In this part of my Visual Studio Productivity Tips series, let's learn how to do that.
Visual Studio Productivity Tips:

When you search for a term in the Find and Replace dialog window, it displays the result with matched file name along with the matched code line. Its the default view of the Find Results dialog. As shown in the below screenshot, it contains the file name (left) and the matched line (right) in the result window:

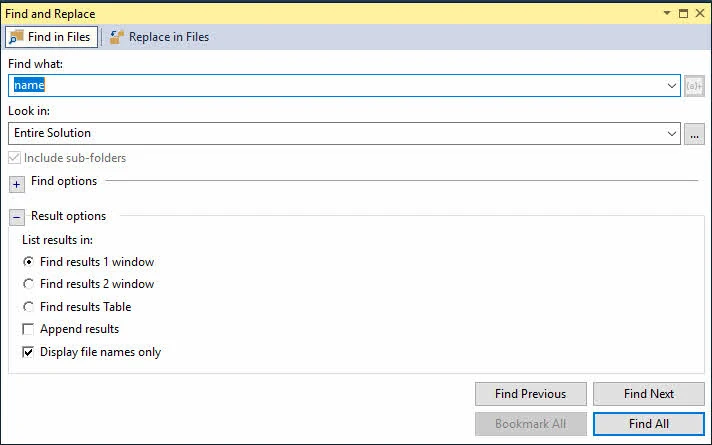
When you would like to focus only to the file names, where the term is present, invoke the Find and Replace dialog and select the Display file names only under the Result options, before hitting "Find" as shown below:

This will result a list of file names where the search term is present. Thus, narrows down the search and helps you to focus on what you want to view. Here's a screenshot that you would like to refer:

I hope that this quick tip will help you next time when you hit search in your Visual Studio editor. Don't forget to share this trick with your friends and colleague.


