Apart from the other cool new features, the giant company also added a feature in Microsoft Visual Studio named “Layout Management”. This is a nice feature for people working on multiple devices with Visual Studio 2015. Using this you will be able to save and sync your IDE layout across devices.
Today in this post, we are going to discuss this and will learn how to save and sync the Window Layout. Continue reading and let us know, how this can benefit you.

This happens with many developers who work in the same IDE but in a different system (in the office and at home). While working across multiple devices, it is required to save the layout of the current window and load the same in a different system to easy access. Visual Studio 2015 provides a way to handle this case. As you are already logged in to the IDE, it is easy to sync the settings.
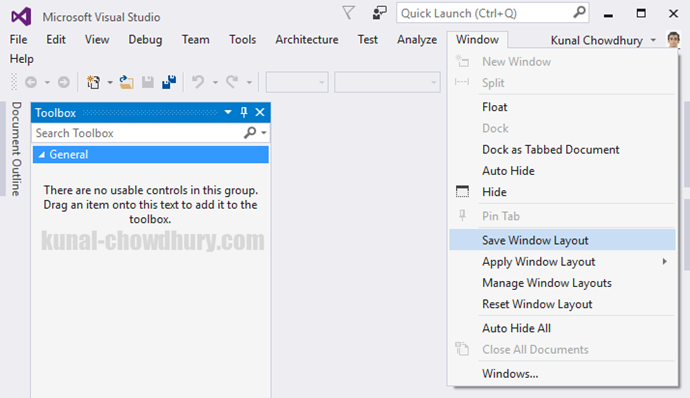
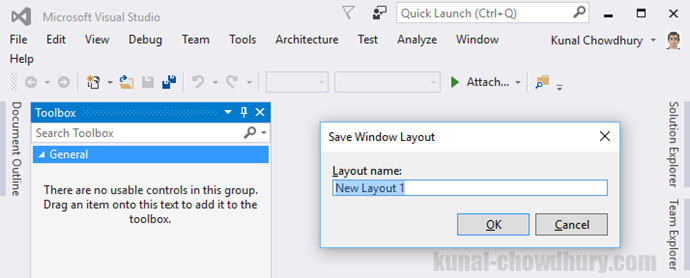
To save your current windows layout, go to the Window menu –> Save Window Layout. This will ask you to provide a name for the current layout.


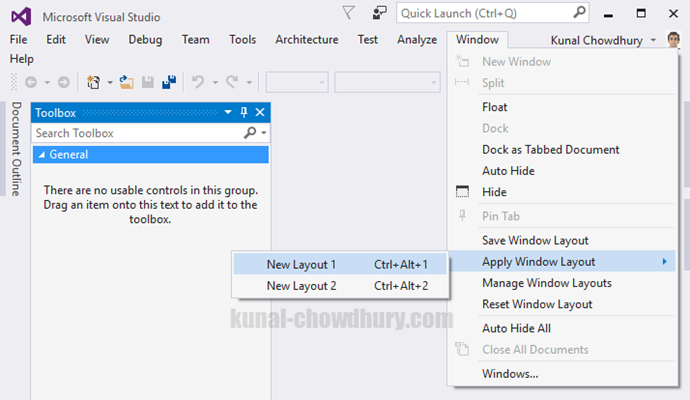
If you have multiple layouts saved, you can switch between different layouts. To do this, go to the Window menu –> Apply Window Layout and select the layout name that you want to apply.

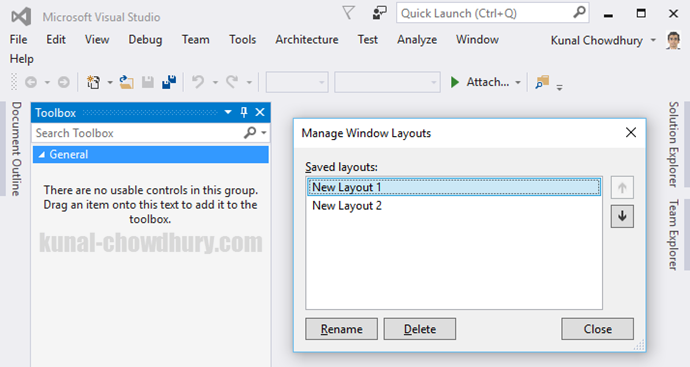
In case you want to rename/delete an existing saved layout, go to the Window menu –> Manage Window Layouts. A dialog will pop up on the screen. Select the saved layout and click “Rename” or “Delete” based on your need. Also, you can reposition the layout by clicking the up/down arrows.

If you want to reset the current layout to default settings, you can do this by navigating to the Window menu –> Reset Window Layout. Hope you liked this. Please share your feedback in the below comment section. Don’t forget to read my previous posts on Visual Studio 2015 Tips & Tricks series here:


