Not many of us wants to work in the designer view of Visual Studio while working with the XAML files. This could be due to no requirements of changing the UI layout rather than few data bindings. By default, Visual Studio loads the XAML designer view.
In this post we are going to learn how to disable the designer view and/or change the way it loads the default document view.

By default, Visual Studio loads the XAML designer view in a way that you can see both the designer and the code in split fashion. Loading the designer view sometimes takes time and thus most of the developers working in XAML wants to turn it OFF.
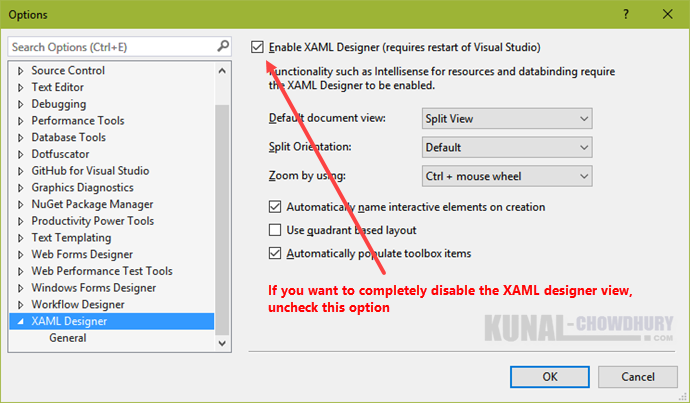
In Visual Studio 2015, you can easily disable it and/or change the way it loads. To do so, open the Visual Studio editor. Go to Tools –> Options and navigate to the “XAML Designer” page as shown in the below screenshot. To disable loading the designer view, uncheck the item labeled “Enable XAML Designer (requires restart of Visual Studio)”. As stated, this changes require you to restart your IDE.

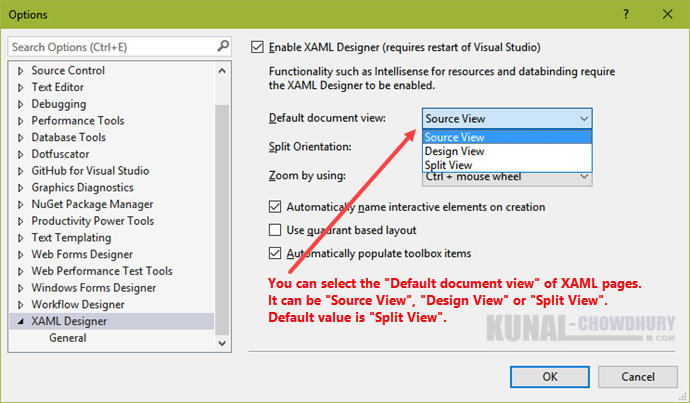
If you don’t want to disable it but want to change the way it loads, you can easily do so from the same settings page. As shown below, find out the dropdown that says “Default document view”. By default, it is set to “Split View”. In this view, you will have both the designer view and source view.
Don’t miss : Visual Studio 2015 Tips & Tricks
Select either “Design View” or “Source View” from the list. Design view will load the XAML page in designer and Source view will load the XAML code page. If you feel that the designer is slow in loading and/or you don’t need the design view to load by default, chose “Source View” from the available list.

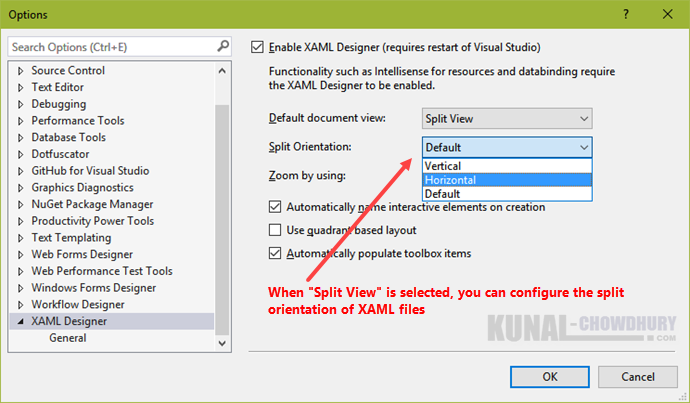
If you are using “Split View”, you can ask the IDE to change the splitter orientation to either horizontal or vertical. Refer the below screenshot for details:

I hope that the post was helpful in order to enable/disable the XAML designer view and/or the way it loads by default. Don’t forget to read out my other blog posts on Visual Studio Tips & Tricks.


