Do you know, #VisualStudio 2013 can sync all settings across Devices?
In this Visual Studio 2013 tips & tricks post, we will discuss about the new cloud synchronization option in Visual Studio.- Article authored by Kunal Chowdhury on .
In this Visual Studio 2013 tips & tricks post, we will discuss about the new cloud synchronization option in Visual Studio.- Article authored by Kunal Chowdhury on .

Visual Studio 2013 Preview is already available for download and probably the RTM version will come up soon later this year (no expected date yet). Microsoft came up with a set of new features in this release of Visual Studio IDE.
Among them, the first feature that you will notice in VS2013 is the synchronization of appearance, settings, keyboard shortcuts etc. across all devices that you use. Let’s have a first glance to it.
If you are new to Visual Studio 2013, you may want to check the below posts first:
If you already started using Visual Studio 2013 Preview, you might already know about this feature but those who didn’t yet get the chance to explore it, here is the post for you. Using this feature, you will be able to synchronize all your settings of Visual Studio (Themes, Fonts, Colors, Keyboard Shortcuts, Text Editor etc.) in cloud.
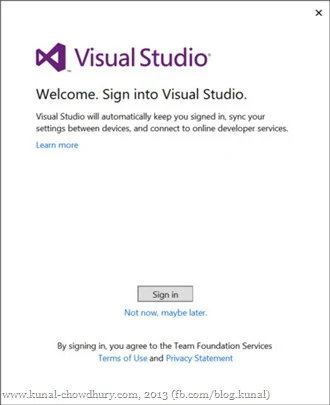
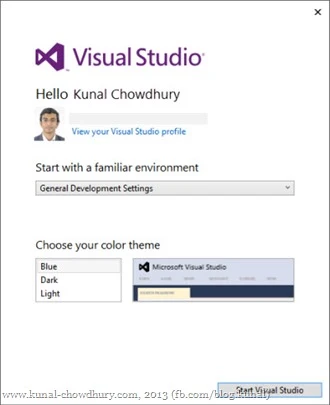
Once you done with the installation, you will be prompted to sign-in with your Windows Live ID. You can chose whether to sign-in and synchronize the settings. If you don’t do it in this step, you can sign-in later. The next screen will allow you to chose the environment settings and the theme of your choice. You can chose any one of the three color theme (Blue, Dark and Light) listed there. These days my favourite theme for Visual Studio is Dark. What’s yours?
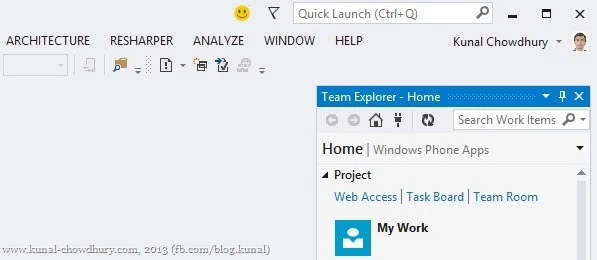
Once you are signed into Visual Studio 2013 IDE, you will see your profile picture and name at the top right corner of the screen. The UI is equivalent to the account sign-in panel like Microsoft Office 2013. Click the dropdown near the logged in user’s name to view all other settings related to that account. You can also sign out from the account here.
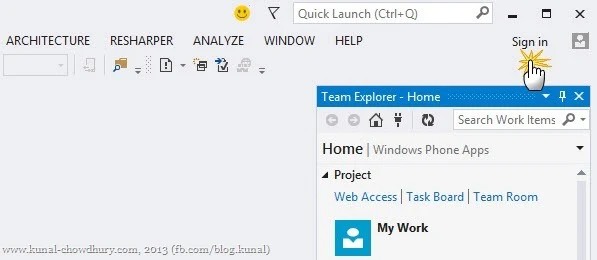
If you did not login to Visual Studio during the first time or if you signed out from it already, you will see a “Sign in” link at the top right corner of the IDE (as shown below). Login with your Live ID credentials to sync the settings of your IDE. Remember that, if you already signed in to a different device with the same ID, this will sync all those settings available on the first device here.
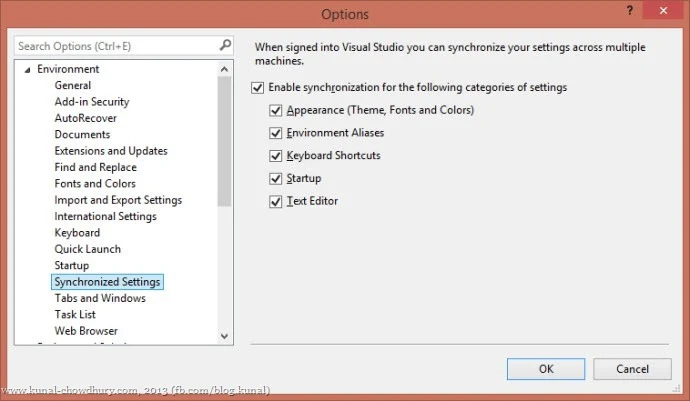
Want to know, what are the settings Visual Studio syncs to the cloud? Go to Tools –> Options and from the left side navigation pane, go to Environment –> Synchronized Settings. In the right panel you will see all the options that will be synchronized across the devices with the same credentials.
If you don’t want any one of them, just uncheck and this will not be synchronized. Check it back to make the IDE synch with the cloud storage automatically.
I hope, this gave you the basic idea of the settings synchronization feature in Visual Studio 2013. If you use this, you will not have to replicate the same environment on all your devices. This will automatically synchronize themes, colors, keyboard shortcuts, text editor settings etc. in your other instances of Visual Studio 2013.
There are lot many features and improvements in Visual Studio 2013. I am going to discuss them here but let’s keep them for a new blog post. In the mean time, if you did not download the ISO, get it from here: http://bit.ly/11NPoD7
Connect with me on Twitter, Facebook and Google+ if you want to discuss anything with me. Drop a line below with your queries or story with Visual Studio 2013. Let the others follow. Till the next blog post, have a great day.
Thank you for visiting our website!
We value your engagement and would love to hear your thoughts. Don't forget to leave a comment below to share your feedback, opinions, or questions.
We believe in fostering an interactive and inclusive community, and your comments play a crucial role in creating that environment.