What is Etcher, and how to use it?
Have you heard about Etcher? It is a open source .ISO/.IMG file generator utility from Balena to create bootable USB flash drives.- Article authored by Kunal Chowdhury on .
Have you heard about Etcher? It is a open source .ISO/.IMG file generator utility from Balena to create bootable USB flash drives.- Article authored by Kunal Chowdhury on .
Etcher is the popular name used to refer to BalenaEtcher. BalenaEtcher is software whose source code is accessible freely and gives room for further modification and reallocation. Etcher is used for writing image files such as .img, .iso, and zipped folders creating USB flash drives that are bootable.
Before its existence, users experienced a hassle in writing images on detachable devices such as SD cards. Etcher can quickly burn an operating system into an SD card, for instance, thus getting rid of long and baffling procedures.

Developed by Balena, BalenaEtcher supports Mac OS, Linux, and Windows. It's working on all these platforms explains its growth in preference to many, including distro hoppers.
Etcher has undergone modifications from its initial purpose of writing ISOs to burn images on removable gadgets. When compared to other alternatives, Etcher beats the odds by being extra reliable and easy to use. These alternatives include Rufus, Easy2Boot, and dd. However, all these programs don't stand a chance against Etcher. Read through and find out why.
Some of the outstanding features of Etcher include the following:
Futuristically, Balena looks at establishing the use of the live SD cards or USB flash drives as hard drives by developing persistent storage support in Etcher.
The guidelines of downloading BalenaEtcher are simple and require no technical skills. The procedures followed are below:
As for installation instructions of Etcher, the software follows a similar process across all platforms (Windows, Mac OS, and Linux) it supports with a slight twist on either. Remember, the operating systems have their share of differences.
Etcher's installation steps on Windows are as follows:

If you are a Mac OS user, the steps you will follow are:
Likewise, an installation on Linux follows a couple of steps. These steps are:
It is vital to note that all the steps you follow in the different operating systems, as highlighted above, commence after Etcher is downloaded and the command of installation is initiated.
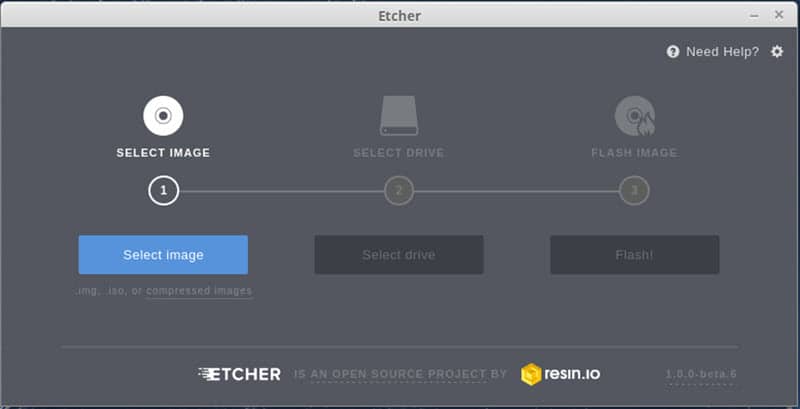
As stated earlier, you can use BatenaEtcher to develop USB drives and SD cards that are bootable. A simple three-step process is followed:
Step 1
Choose your source image. This image is then dragged and dropped to the Etcher app, and this can be done using the file picker.

Step 2
Select the drive you target. Remember, it is safe to separate your detachable devices from your internal hard disks; otherwise, you may erase them unintentionally.

Step 3
Click the flash button to initiate the writing exercise; it ends in only a few minutes.

After a burning process is completed, the user has the option of burning the same image on another card or selecting a different image.
Thank you for visiting our website!
We value your engagement and would love to hear your thoughts. Don't forget to leave a comment below to share your feedback, opinions, or questions.
We believe in fostering an interactive and inclusive community, and your comments play a crucial role in creating that environment.