How to make Web Note from Edge Browser in #Windows 10?
Another feature of Microsoft Edge in Windows 10 is the ability to take Web Note easily without any additional tool or plugin. Using this, y...- Article authored by Kunal Chowdhury on .
Another feature of Microsoft Edge in Windows 10 is the ability to take Web Note easily without any additional tool or plugin. Using this, y...- Article authored by Kunal Chowdhury on .

Another feature of Microsoft Edge in Windows 10 is the ability to take Web Note easily without any additional tool or plugin. Using this, you can not only able to take web note, but also can mark, highlight, comment in that captured note before saving it.
Today we will show you how to do this. Continue reading the post and let us know, what you think about Web Note in Edge browser.

The web note capturing feature in Microsoft Edge will allow you to take quick note, mark and highlight a block/text easily and put it in your OneNote or send it. Also, you can clip a portion into your clipboard to paste it in some other place. Though it is a very good feature within the browser window, but missing some important functions like undo/redo, insertion of texts (currently it is achievable using the Pen tool or typed note but adding direct text within the note will be a great option), cut, paste etc.
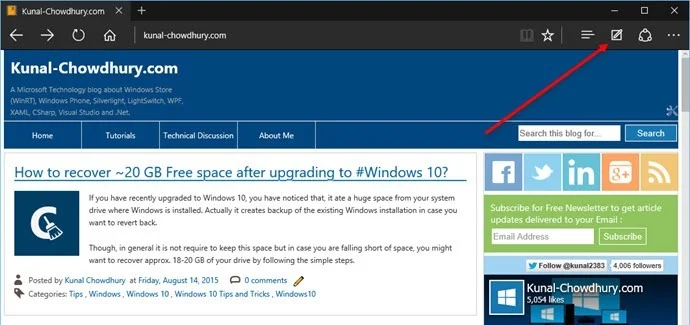
To make a web note, just open the website/webpage which you want to capture in your note and then click on the tiny button “Make a Web Note” present at the top right corner of the screen, as marked below:
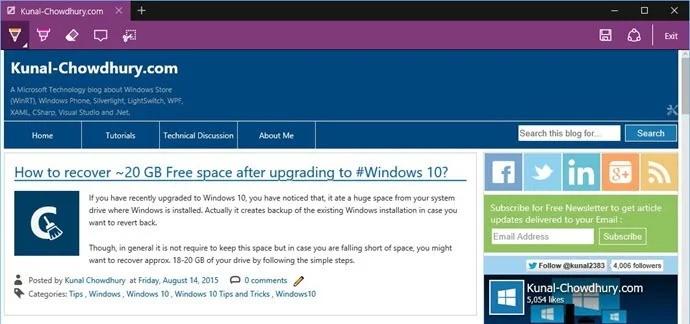
This will immediately capture the web page in a one note like tool and will provide you some options to mark or highlight before saving it or sharing with your friends/colleagues. The common functions/tools that it provides are: Pen, Highlighter, Eraser, typed note or comment, clip to copy, save, share. Hope to see more new functions in future update.
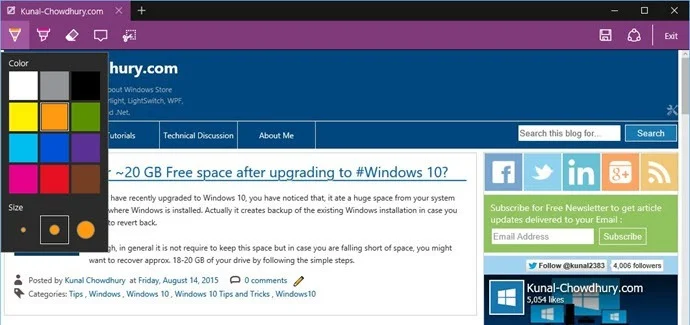
Once you click on the tiny arrowhead of the Pen tool, it will open up a dropdown to allow you to select the marker color and size. Currently there are 12 colors and 3 marker size available for you to select.
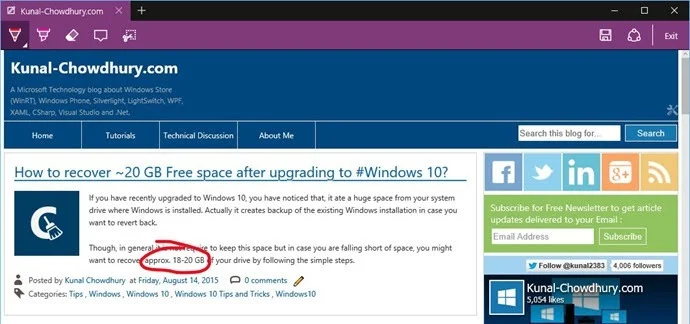
You can then mark a specific text or block using the color that you selected. If you don’t click on the arrowhead and instead of that, you click directly on the pen tool button, you will be allowed to mark with the default color and size already selected.
Similarly you can select the highlight color and size but here only 6 colors are available for you to choose. Like pen tool, the highlighter tool also provides you to select three different sizes. If you don’t want to select any specific color or size, you can proceed with just the highlighter instead of clicking the arrowhead.
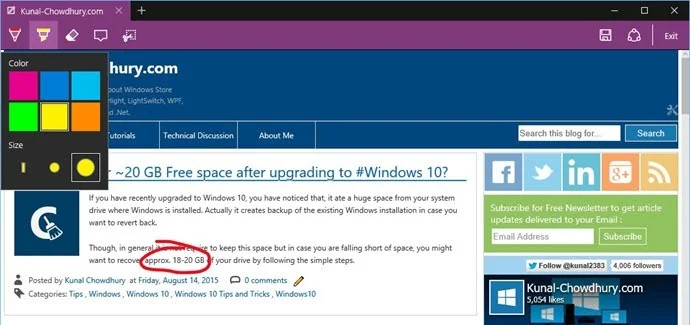
Once you select proper color and size, you can highlight the text or section in the captured web page in the web note. Please note that, undo/redo options are not available in this window.
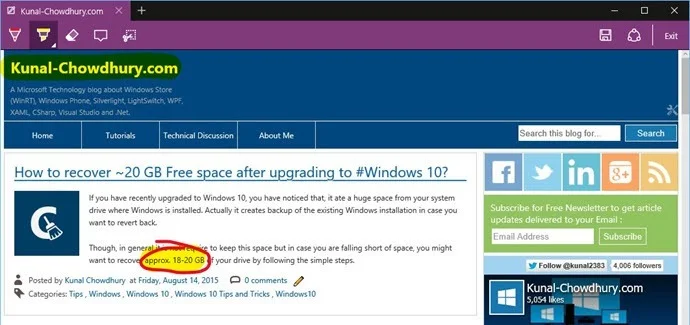
If you think that, you did some mistakes, you can easily clear the same by clicking the eraser tool and highlight the mark that you want to clear. Click the tiny arrowhead in the tool bar and select “Clear all ink” to remove all the changes you performed using the Pen and Highlighter tool. This works almost like the undo function but it’s actually does not do it.

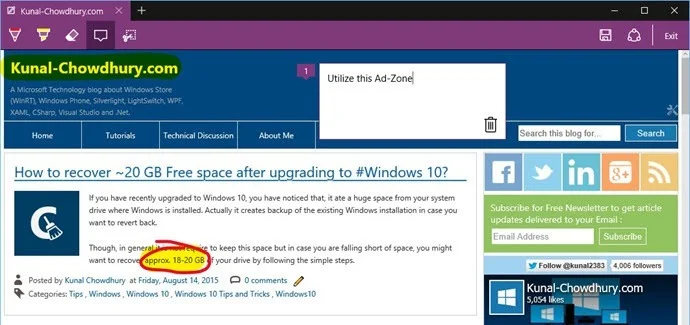
In web note, you can add some texts but as a comment. Free flow text in a transparent background is not currently possible in it. Click the typed note icon to insert a comment. You can reposition, minimize or delete the added comment if you want to do so. To delete the comment, click the small trash icon. In case you want to minimize it, click the comment no. In case you want to reposition it, click the comment no. and drag it to a desired place.
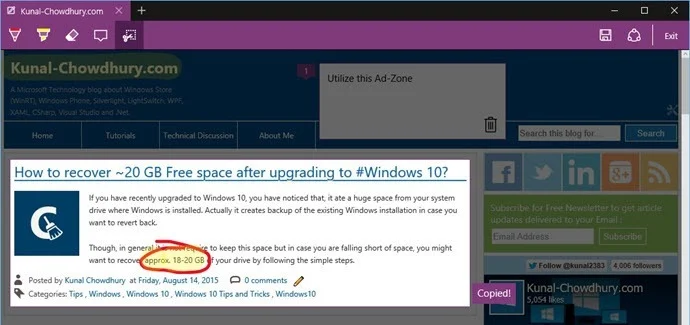
The next toolbar icon is used to clip a selection and copy it in the clipboard, so that, you can paste it in some other application. To do so, click the icon that says “Clip”. This will ask you to drag your mouse cursor the create a region to clip.


Once you create the region, it will automatically copy the selection in your system’s clipboard. In case you want to cancel the selection, just click outside the selected block.
You can easily save the captured web note in your One Note book for future. Clicking the save button will show you the preview of the captured page and will provide you the option to send this capture in your One Note document. This will also allow you to share the note directly, by clicking the share icon.
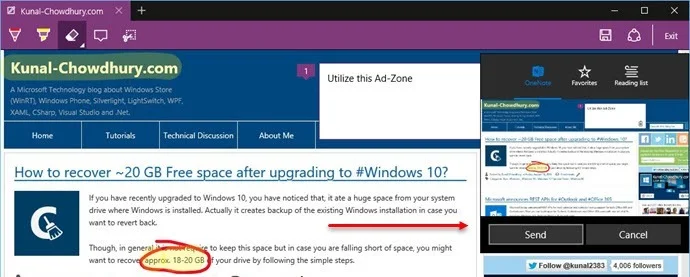
That’s all as of now. I hope, the above post was useful for you to understand the web note feature of Microsoft Edge browser in Windows 10. No. of screenshots has been provided to understand it easily. What do you think about this web note feature within the browser? How much will it be helpful for you? Drop a line below with your comments and let the community know about your views.
Don’t forget to share it in your social networking channels and help your connected friends to know about this excellent feature available in the new Edge browser. If you are new to Windows 10, check out my entire series of blog posts on Windows 10 Tips & Tricks - http://win10tips.kunal-chowdhury.com. If you want any topics or feature to be cover in this space, drop a line below in the comments section and I will try to put it here.
Subscribe to my Social Networking feeds like Twitter, Facebook, Google+, LinkedIn, RSS to get the updates that I share over there. Don’t forget to re-share what I share over those channels. Thanks for reading by blog and following it. Have a great day ahead.
Thank you for visiting our website!
We value your engagement and would love to hear your thoughts. Don't forget to leave a comment below to share your feedback, opinions, or questions.
We believe in fostering an interactive and inclusive community, and your comments play a crucial role in creating that environment.