Did you install Visual Studio 2012 in a fresh new environment and willing to target your project for .NET Framework prior to Framework 4 but could not see the option to change to the older framework version? This post will help you in details.
Continue reading more to know about the default .NET Targeted Framework of Visual Studio 2012 and the steps to install additional framework version.
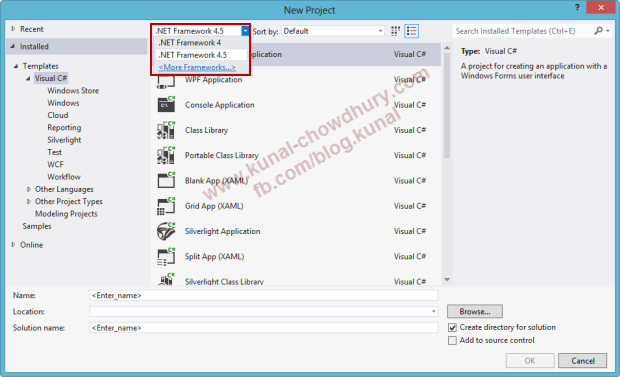
If you are new to Visual Studio 2012 and installed freshly in your all new development environment, you could probably face this issue. You will not see all the .NET framework version listed in your Visual Studio “New Project” dialog. By default this new IDE comes with only two framework version: .NET Framework 4 and .NET Framework 4.5. If you want your project to target the older version too, you need to install the same to integrate in the IDE.
By default, you will see the following targeted framework in the dropdown present in the “New Project” dialog:

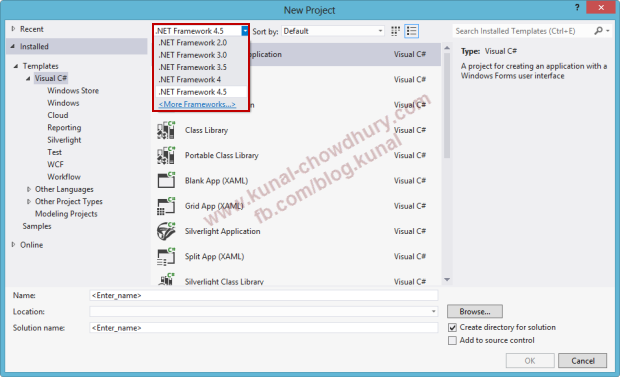
If you want to install the older framework versions for your Visual Studio IDE, you need to download the appropriate .NET Framework versions in your PC. To use .NET 3.5, you need to download the .NET Framework 3.5 and all it’s prior versions. You can do this by clicking the “More Framework” link present in the dropdown itself.

Once installed, you will see all the installed Frameworks listed in the dropdown as shown above and you will be able to create and/or open those solutions using your Visual Studio 2012 IDE.
I hope that this small post was informative to you. Let me know your queries if any. Stay tuned with my latest articles, tips and news at my Technical Blog. I am also available on Twitter and Facebook. Connect with me for latest updates and news. Cheers. Happy Coding.


