Visual Studio 2012 Tip: Refactor your Code easily
In our last blog post we discussed about browser switching mechanism in Visual Studio 2012 for web developers to test their web application...- Article authored by Kunal Chowdhury on .
In our last blog post we discussed about browser switching mechanism in Visual Studio 2012 for web developers to test their web application...- Article authored by Kunal Chowdhury on .
 In our last blog post we discussed about browser switching mechanism in Visual Studio 2012 for web developers to test their web applications against different web browsers which actually increases the productivity time of such applications.
Today in this post, we will learn about the Refactor feature of Visual Studio 2012 which will again improve your productivity without using any additional tools or extensions. So, continue reading this post to learn about this feature of new Visual Studio IDE.
Note: I composed this post based on Visual Studio 2012 RC (version: 11.0.50522.1 RCREL) and can’t guarantee this in the final version of the product though the chance of feature change is very negligible.

Microsoft introduces a new “Refactor” menu in Visual Studio 2012 IDE, which will help the developer to refactor their codes easily without using any 3rd party control or extensions. As this is an in-built feature now, hence you will get it automatically with the new Visual Studio IDE.
Here is a sneak peak of what you will now see in your Visual Studio 2012 IDE when any code file is open in the screen:
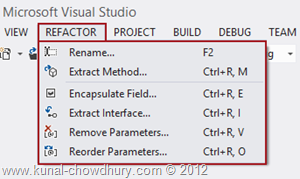
You can also easily access the “Refactor” menu from the right click context menu of the code editor screen as shown below:
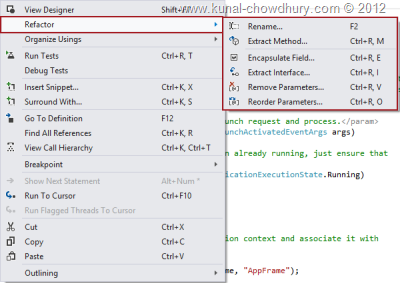
There are six sub menus available in the “Refactor” menu named “Renamed”, “Extract Method”, “Encapsulate Field”, “Extract Interface”, “Remove Parameters” and “Reorder Parameters” as shown in the above screenshots. You will easily get the meaning of each individual menu items by their name. Let’s go to little deep and see the individual screens of the “Refactor” menu items.
Using the “Rename” menu item, you can easily rename any field, property, method, class etc. which will give you option to preview your code before changing it’s reference all over the projects. Have a look into the rename dialog:
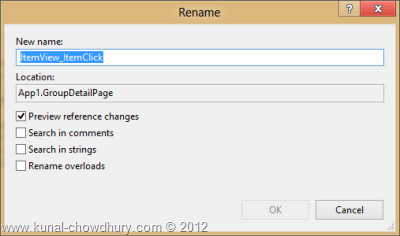
This dialog window also provides you option to search reference in comments, strings and also provides you option to search and rename the overloads.
Suppose you have a bunch of code which you want to move into a separate method, the “Extract Method” menu will help you to refactor such code.
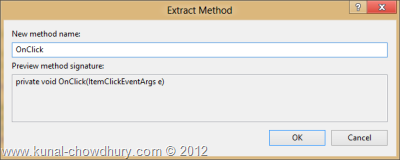
Once it extracts the code to a separate method, it will replace the existing code at the original place with the method call.
Do you have class level fields? Do you want to encapsulate those fields in a property? This dialog window will help you to encapsulate the actual field data by public properties.
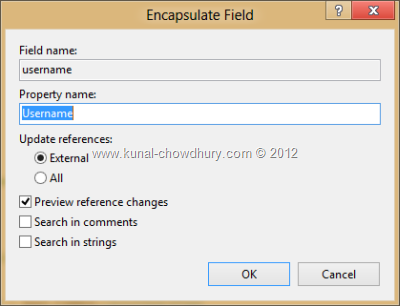
This will allow you to preview the changes before commit. This dialog also enables you to search the reference in comments and other strings available in the solution.
This refactor option will allow you to extract a method to the interface level. When chosen, this will create a new interface in the project and extract the method there to use in other places. Have a look into the below screenshot:
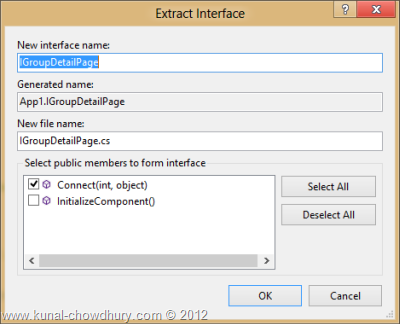
As shown above, you can choose the methods those you want to extract to the interface level and change the name of the interface. When applied, this will automatically inherit that interface in that original class.
This refactoring option allows you to remove additional parameters from a method and update the references everywhere that has been used. Generally you need this feature to remove unused parameters from the methods.
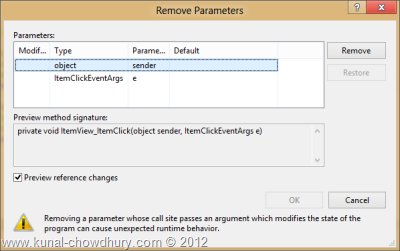
As seen in the above screenshot, this refactoring allows you to preview the changes before committing the changes in all the files.
Parameter reordering is another refactoring mechanism that allows you to change the parameter position passed through the method. The up and down arrows placed at the right side allows you to rearrange them in the method signature as shown below:
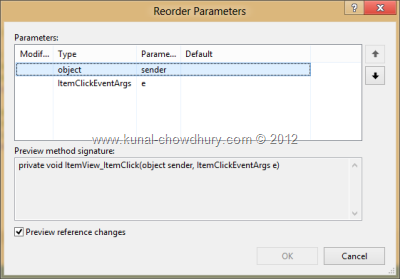
Like other refactoring mechanism, this also allows you to preview the reference changes through out the whole solution before committing in all the files.
I hope that this small tips will be helpful for you to improve your productivity. Stay tuned to my blog to get article updates in coming days. Also connect with me on Twitter, Facebook to get regular updates. Subscribe to my blog’s RSS Feed and Email Newsletter for immediate update.
CodeProjectThank you for visiting our website!
We value your engagement and would love to hear your thoughts. Don't forget to leave a comment below to share your feedback, opinions, or questions.
We believe in fostering an interactive and inclusive community, and your comments play a crucial role in creating that environment.