First Guide to MEF & Silverlight (Part–II)
In my previous article “ First Guide to MEF & Silverlight (Part–I) ” I discussed about MEF with a small simple console application. Hope...- Article authored by Kunal Chowdhury on .
In my previous article “ First Guide to MEF & Silverlight (Part–I) ” I discussed about MEF with a small simple console application. Hope...- Article authored by Kunal Chowdhury on .
In my previous article “First Guide to MEF & Silverlight (Part–I)” I discussed about MEF with a small simple console application. Hope that was useful to you to understand the basic knowledge of MEF. In this article, I will guide you to create a simple Silverlight application using the MEF. If you are new to MEF, I strongly recommend you to read my previous article to gain knowledge on the basic things of MEF like Importing, Exporting, Catalog, Container etc.
Read the complete article and at the end if you have any queries, please let me know. I will try to answer them as soon as possible. Always Appreciate your valuable feedbacks.
To start working with the Silverlight & MEF application, you need to setup your development environment. In your development PC, you need the following things already installed:
Once your environment is ready with the above tools, we can start with our next step.
First of all, we need to create a Silverlight application project and then we have to add some assembly reference in order to work with the MEF. Hence, follow the following steps to setup your project:
![Image [http://www.kunal-chowdhury.com] Image [http://www.kunal-chowdhury.com]](http://lh3.ggpht.com/_MOj9mkIt81A/THPj_8WkJ7I/AAAAAAAAGew/DIyRp755gaw/rw/image2.png?imgmax=800)
![Image [http://www.kunal-chowdhury.com] Image [http://www.kunal-chowdhury.com]](http://lh5.ggpht.com/_MOj9mkIt81A/THPkAj63m9I/AAAAAAAAGe0/k6I4Sui237c/rw/image5.png?imgmax=800)
![Image [http://www.kunal-chowdhury.com] Image [http://www.kunal-chowdhury.com]](http://lh6.ggpht.com/_MOj9mkIt81A/THPkBQUNj9I/AAAAAAAAGe4/4m0D61x-9e4/rw/image8.png?imgmax=800)
![Image [http://www.kunal-chowdhury.com] Image [http://www.kunal-chowdhury.com]](http://lh6.ggpht.com/_MOj9mkIt81A/THPkCB4qpVI/AAAAAAAAGe8/a9zUNK-SMOQ/rw/image11.png?imgmax=800)
Once done with all the above steps, your project is ready for the MEF development.
Let us first decide what we want to do in our example. We will create a Silverlight application where we will include some UserControls as a Widget. This is for learning purpose and hence don’t go with the UI.
So, in our sample application we will create a UserControl and mark it as Exportable. Then we will import the UserControl in our application to add it in the UI. Next we will create another UserControl and mark it as Exportable, so that without any other change in the code, it should add in the main UI. This is just an example to showcase the MEF functionality in Silverlight applications.
Let’s jump into the code. First of all, we will create an Interface called IWidget and we will use this interface to build our UserControl. We will just inherit this to the UserControl and while exporting or importing we will use the same interface type. Reason behind this is to make sure only the specified type of control will be marked for MEF. If we have two different types for two different kind of controls, it will be easier for us to manage in the main screen. So, just create a blank interface named IWidget which will look like below:

Now, in the MainPage.xaml add an ItemsControl & name it as “widgets”. Wrap the ItemsControl with a StackPanel to hold the items. The XAML file will look as below:
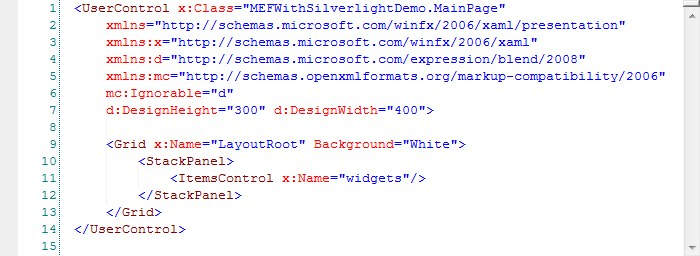
Now it’s time to create a UserControl. Right click on the Silverlight project and add one UserControl & name it as “EmployeeWidget”. We will not design more inside it as it is not require to understand the MEF. To make it properly visible just add one TextBlock with some strings. In our example, I am setting “Employee Widget” as the text string for the TextBlock and also setting a color “Red” to the Grid background. Resize the UserControl to 150 x 150, so that, it will set properly in the screen.
Let’s see the below code for detailed layout:

As mentioned above, I resized the control to 150 x 150 and then changed the background color to Red. Added a TextBlock having “Employee Widget” as the value to the TextProperty of the TextBlock with a foreground color of White, so that, it will be visible on top of the Red color. No need to describe more on it. Just check the above xaml and you will get the idea behind it.
Press F7 in the EmployeeWidget.xaml page to open up the code behind file. Inherit the EmployeeWidget class from IWidget. Once done, add the attribute “Export” having the type of IWidget to the class. This will ensure that the class will export for the MEF to Satisfy. Look into the code here:
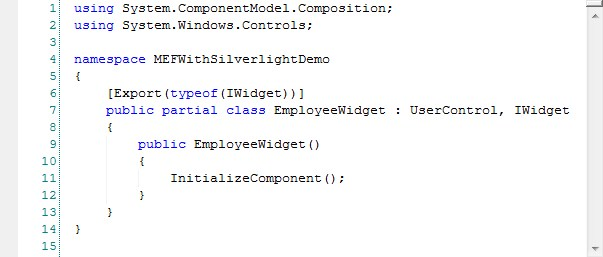
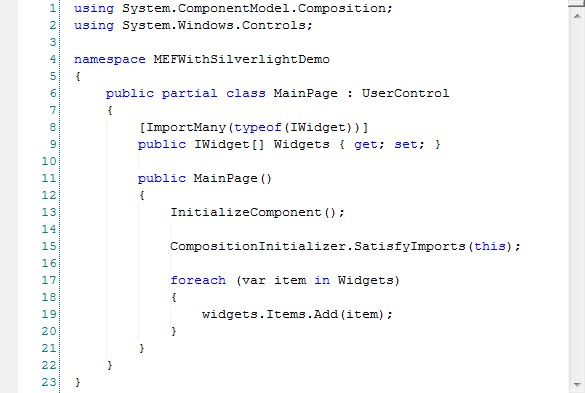
As our UserControl has been exported for the MEF to satisfy, it’s the time to import it in our MainPage. To do this, open the MainPage.xaml.cs and create a property “Widgets” of IWidget type array. We are using array type to ensure that, we can import many widgets there. So, mark the property with the atrribute “ImportMany” of type IWidget. Once that is done, our code is ready to import the exported class.
Now inside your MainPage constructor, iterate through the array and add all the Widgets as the item to the “widgets” items control which we already added in the XAML. Now if you run your application, you will notice that the Widgets array is null. Why? Just think. Oh yea!!! We forgot to satisfy the MEF Initializer to satisfy the property. What to do for that?
To satisfy the imports, you need to call “CompositionInitializer.SatisfyImports(this);” just before iterating through the array list. Have a look into the code:
Now, run your application once again and this time you will see the EmployeeWidget added to the UI screen with a text “Employee Widget” having a Red background. Here is the screenshot of the same:

Woho!!! Nice. We didn’t create the object of the UserControl and add it to the ItemsControl. The MEF framework did it for us. Once satisfied, it created the object and imported it to the MainPage.
That’s it. Now we will do one more thing. We will create another UserControl named “CustomerWidget” and follow the same steps mentioned above for exporting the control. This time we will set the text to “Customer Widget” and will set the background color to Green. This will make it easy for us to distinguish between the items.
Here is the XAML code of the CustomerWidget usercontrol:

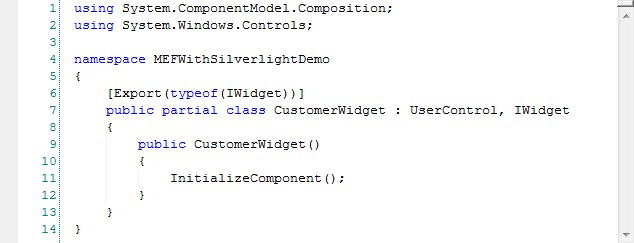
Now open the code behind file of CustomerWidget by pressing F7 in the xaml page and follow the same step as we did for the EmployeeWidget i.e. implement the CustomerWidget from the interface named IWidget and mark the class exportable by setting the Export attribute of the IWidget. Here is the code for your reference:
That’s it. This time we didn’t add/modify anymore code in our MainPage. Just run the application and you will see the CustomerWidget added in the panel along with the control named EmployeeWidget. See the screenshot of the same here:
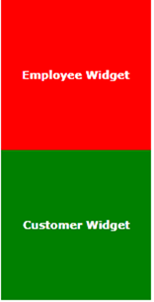
So, what did we learn here? We learnt that without changing the original code, we can easily import any control with the help of MEF. It is very easy to plug something into our original application without doing any change in the main application. In such case, instead of updating the original application we can easily attach our feature like a plug-in.
Hope, this article helped you to understand the basic functionality of MEF with the help of Silverlight. In my next article, I will show you more on MEF with the help of a Console Application. Till then keep learning about MEF & do your small small POCs to learn in depth.
Please don’t forget to post your feedbacks and/or suggestions to improve this article. Appreciate your time for reading through this article.
Thank you for visiting our website!
We value your engagement and would love to hear your thoughts. Don't forget to leave a comment below to share your feedback, opinions, or questions.
We believe in fostering an interactive and inclusive community, and your comments play a crucial role in creating that environment.