Want to install the Windows 8 on multiple systems but don't want to burn on a DVD? Here's how you can create a bootable USB drive containing the Windows 8 Operating System. An USB drive is always faster than DVDs and the chances of failed or corrupt installation are very low as compared to other optical medias. So lets see how you can create the bootable USB of Windows 8 in the easiest way possible.
WinUSB Maker is a tool to make any USB, External HDD as bootable with Windows Setup. In this post we will learn how to create a Windows 8 bootable USB device from ISO image. Though we will create the Windows 8 Release Preview installer, but it is applicable for OS.
WinUSB Maker is a tool to make any Removable Device as bootable with Windows Setup. It also features full faster drive backup / restore including the MBR and all stored files with fastest file copy and maximum process priority level. User can work with Setup DVD / Setup Folder / Setup ISO Image and make a DOS / GRLDR automated Bootable USB Disk. It supports devices larger than 1TB and can identify compatible setup folders.
You can download WinUSB Maker from Josh Cell Softwares to continue creating the Windows 8 Bootable USB device.
Prerequisite
Here are some prerequisite that you need before starting with this process:
Once all the above prerequisites are ready, we can start with creating the bootable Windows 8 USB device which you can use to install the Win8 OS on multiple systems without burning it on DVDs. This process is faster and there is a less chance of failure and corruption of the installation media.
How to Create Windows 8 Bootable USB Device from ISO Image
Now it’s time to start with the process to create the bootable USB media to install the Windows 8. Open the WinUSB Maker software under administrative privileges mode. To do this, right click on the file and chose “Run as Administrator” from the right click context menu.
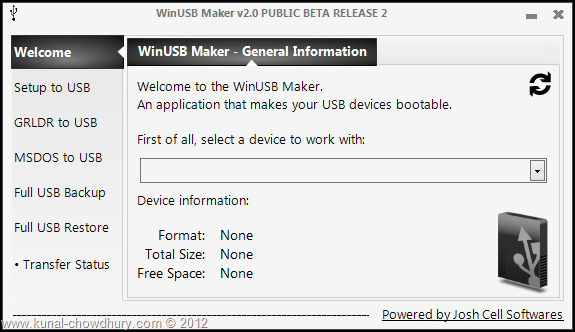
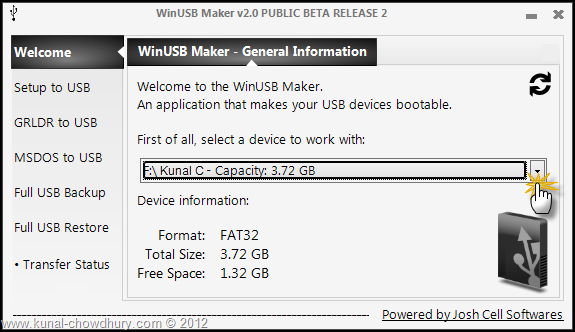
Now from the first tab (“Welcome” screen), select the removable device from the dropdown to work with first initial step. Once selected, it will show you the device file system type, total space and free space. If your device has any data, it will ask you to format the device at the later stage.
Now click on the “Setup to USB” tab at the left panel of the window. This will ask you for the ISO image file. You can also chose a directory instead of an ISO file. For our case, we will chose the “I want to work with an ISO image file” radio button and select the ISO file by clicking the button as shown below:
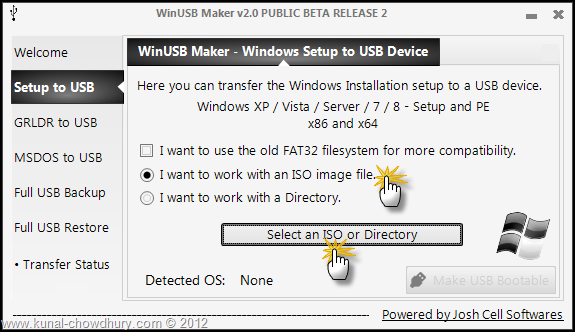
This will detect the OS present inside the ISO. Here you will notice it as “Windows NT 6.x based” as the detected operating system.
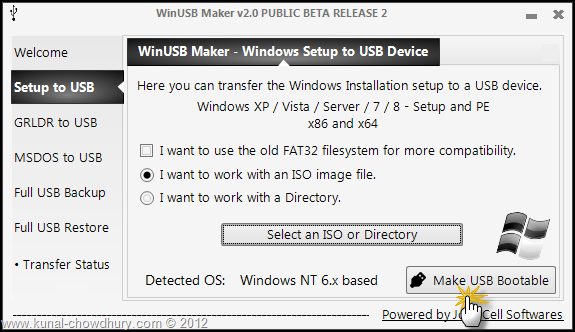
As shown in the above screenshot, click the button called “Make USB Bootable” to start the bootable USB creation process and show you the process in the screen. Once this is done, you will be able to use the new bootable USB drive to install the Windows 8 OS in all of your systems.
I hope that, this post will help you to create the bootable Windows 8 Installation USB media using the WinUSB Maker software. In the next post, we will use another tool to create the same. Till then enjoy!!!
Last but not least, connect with me on Twitter and Facebook for technical updates and articles news. Also subscribe to my blog’s Newsletter to get all the updates delivered directly to your inbox. We won’t spam or share your email address as we respect your privacy.


